When using Autoware with the digital-twin simualtor AWSIM, we often want to run the two software on separate PCs or machines to improve performance.
I previously tried to run Autoware and AWSIM on two separate GPU-Laptops and was able to get it running pretty smoothly. I posted a video of it as well.
In this post, I’ll quickly like to go over how I did this.
Basically, our goal would be to go through the AWSIM Quick Start Demo Tutorial, but run AWSIM and Autoware on two separate PCs. So we won’t detail all the steps here, so check the official tutorial as well.
Network Setup
Connect the two PCs with an Ethernet cable and set up the IP addresses for both of them. Confirm that the IP addresses are set up properly and take a note of the network interface name as well by running the ip a command. Try pinging from one PC to the other, and make sure that they have connectivity.
- PC1: For Autoware
- IP Address:
192.168.0.2/24 - Network interface name:
en0
- IP Address:
- PC2: For AWSIM
- IP Address:
192.168.0.3/24 - Network interface name:
en1
- IP Address:
CycloneDDS Configuration
Some additional configurations must be done with CycloneDDS in order to ensure that DDS uses the physical Ethernet link we just created, for exchanging ROS2 message. Otherwise, it may stick to using a different network for sending ROS2 messages (such as over Wi-Fi), which could lead to slower performance or unnecessary traffic and congestion.
In order to configure this, we need to create the cyclonedds_config.xml file in both PC1 and PC2. An example configuration is desribed below. Make sure that the name and address field in the NetworkInterface attribute is filled in correctly.
For PC1,
<?xml version="1.0" encoding="UTF-8" ?>
<CycloneDDS xmlns="https://cdds.io/config" xmlns:xsi="http://www.w3.org/2001/XMLSchema-instance" xsi:schemaLocation="https://cdds.io/config https://raw.githubusercontent.com/eclipse-cyclonedds/cyclonedds/master/etc/cyclonedds.xsd">
    <Domain id="any">
        <General>
            <Interfaces>
              <NetworkInterface name="en0" address="192.168.0.2" priority="0"/>
            </Interfaces>
        </General>
    </Domain>
</CycloneDDS>
For PC2,
<?xml version="1.0" encoding="UTF-8" ?>
<CycloneDDS xmlns="https://cdds.io/config" xmlns:xsi="http://www.w3.org/2001/XMLSchema-instance" xsi:schemaLocation="https://cdds.io/config https://raw.githubusercontent.com/eclipse-cyclonedds/cyclonedds/master/etc/cyclonedds.xsd">
    <Domain id="any">
        <General>
            <Interfaces>
              <NetworkInterface name="en1" address="192.168.0.3" priority="0"/>
            </Interfaces>
        </General>
    </Domain>
</CycloneDDS>
One the file is created on both PC1 and PC2, run the following commands in the terminal on both PCs to activate the configurations.
We assume here that we are in the directory where the cyclonedds_config.xml file is placed. You must remember to set the CYCLONEDDS_URI environment variable on every terminal that you open to activate the configurations.
$ export CYCLONEDDS_URI=file://$PWD/cyclonedds_config.xml
$ ros2 daemon stop
$ ros2 daemon start
Documentation about the NetworkInterface config is detailed here.
Launch AWSIM
In PC2, inside the terminal that we just run the above commands, we can now open the AWSIM executable.
$ cd AWSIM_v1.1.0
$ ./AWSIM_demo.x86_64
Launch Autoware
In PC1, inside the terminal that we just run the above commands, we can launch Autoware.
$ cd autoware/
$ source install/setup.bash
$ ros2 launch autoware_launch e2e_simulator.launch.xml vehicle_model:=sample_vehicle sensor_model:=awsim_sensor_kit map_path:=<your mapfile location>
Then, Autoware should initialize as normal and you should be able to successfully run Autware and AWSIM on two separate machines.
Extras
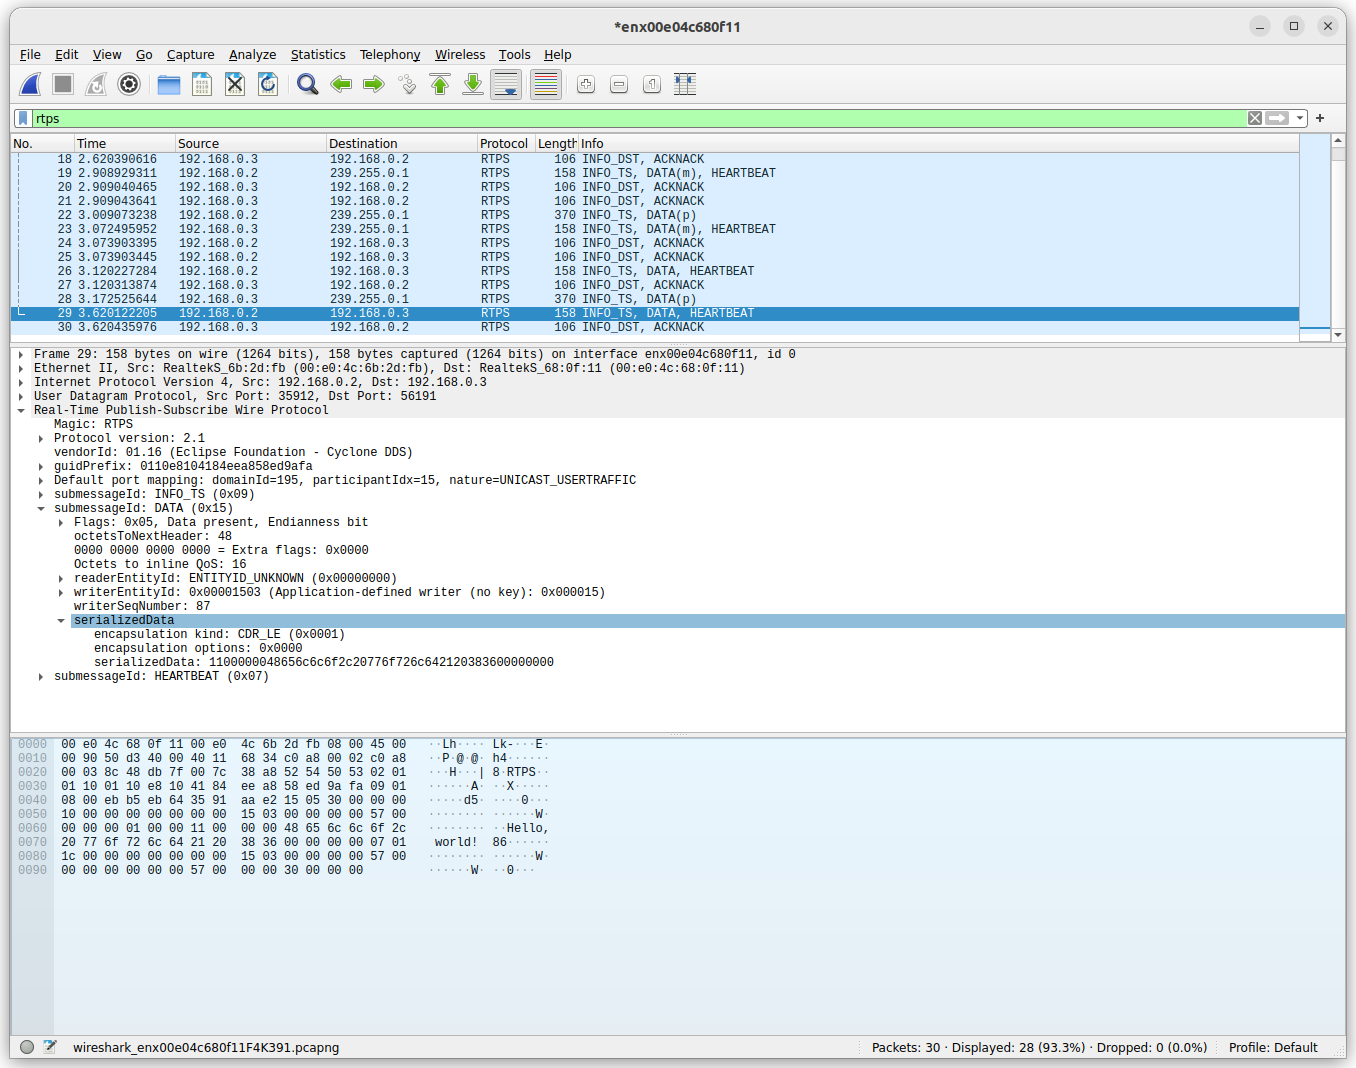
When you have the cyclonedds_config.xml configurations set, you can see the RTPS packets on Wireshark and make sure that they are going through the physical Ethernet link instead of another link such as Wi-Fi.
Here, when you check the packets coming into the Ethernet interface on PC1, you can see the DATA messages.
Meanwhile, when you check another interface such as the Wi-Fi one on the same PC1, you can see that there are no RTPS packets going through.
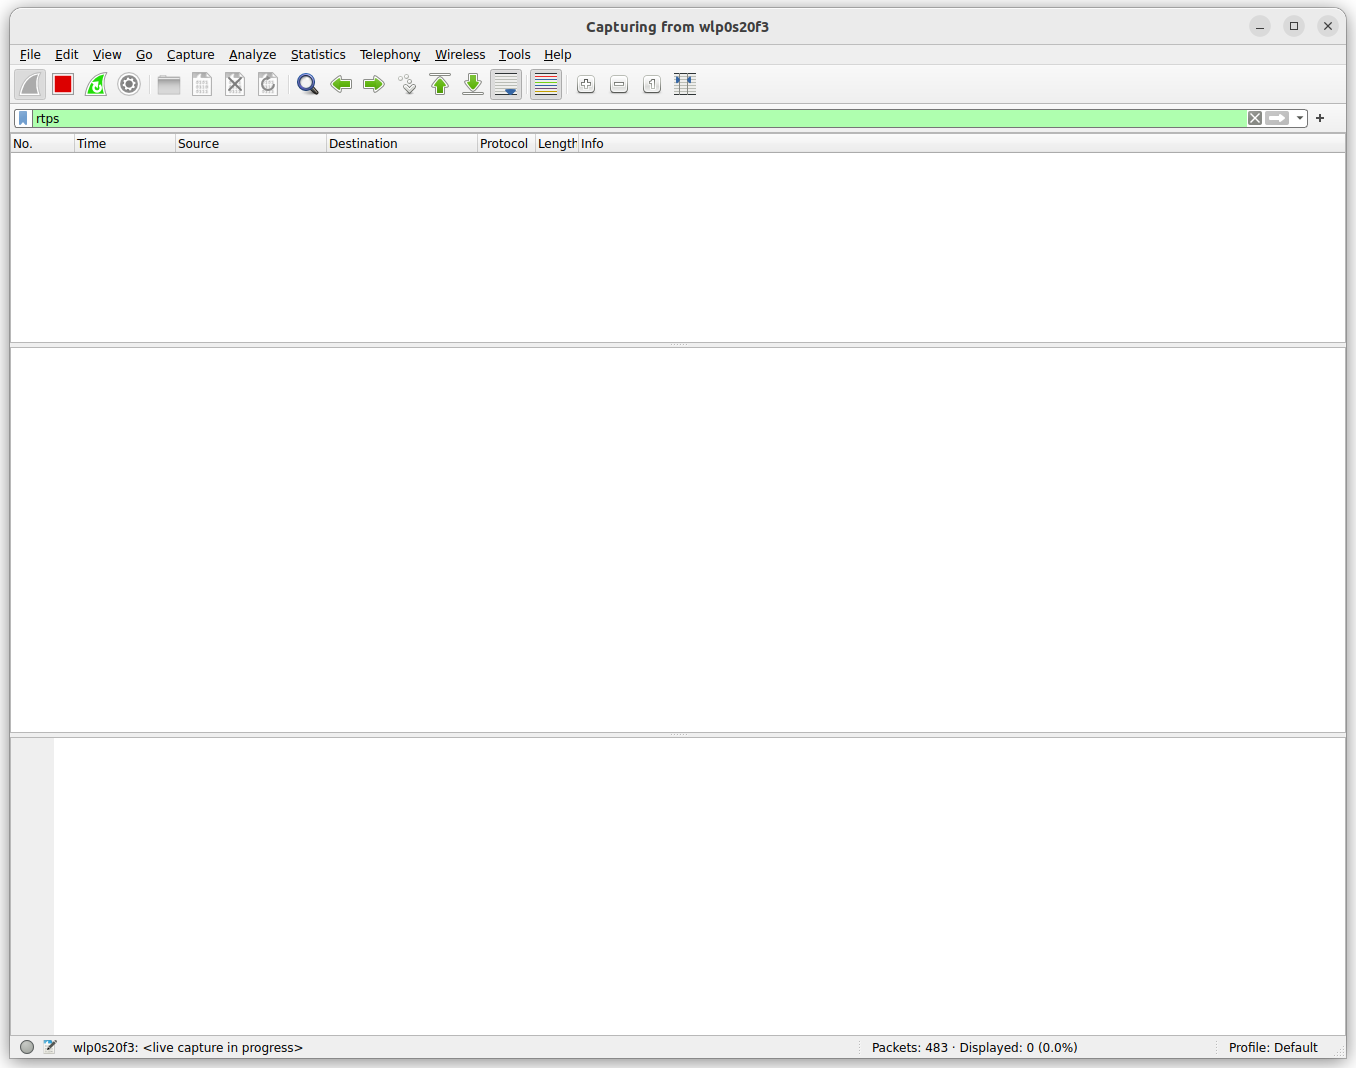
By checking the packets directly this way, you can make sure that the DDS packets are not accidently going through an unexpected network link.